S2000 V2 Enclosure Installation Instructions
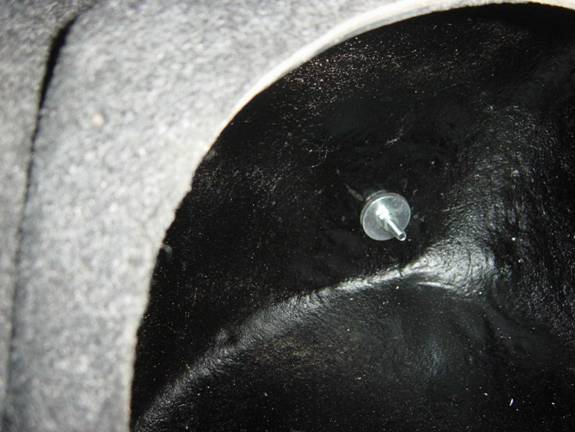
Step 1 – Remove the upper and lower plastic panel rivets (as shown below) along with the panel fasteners towards the trunk latch assembly on this panel so that you can run your speaker wiring behind the panel and install the mounting hardware.
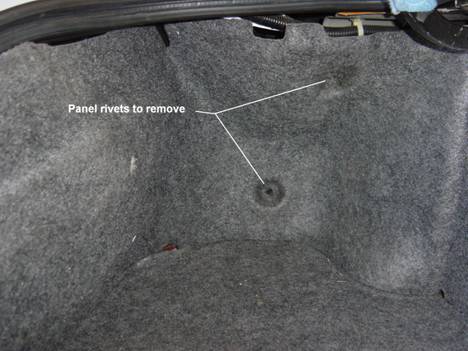
Step 2 – Remove ( pull back) the panel so that you have access to the lower hole where the plastic-rivet was inserted.
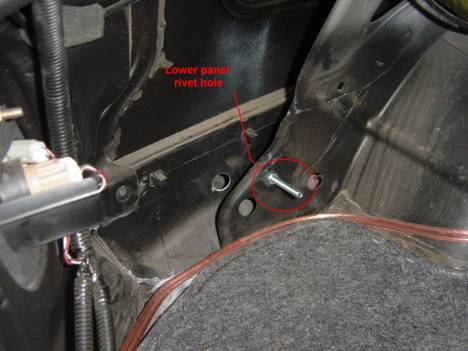
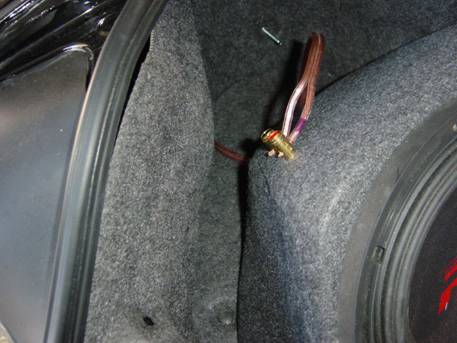
Step 3 – Insert the 2” bolt into the lower hole from the back side as shown in the image below and use the non-locking nut to secure it in place. Tighten the nut and bolt using 2 7/16” wrenches.
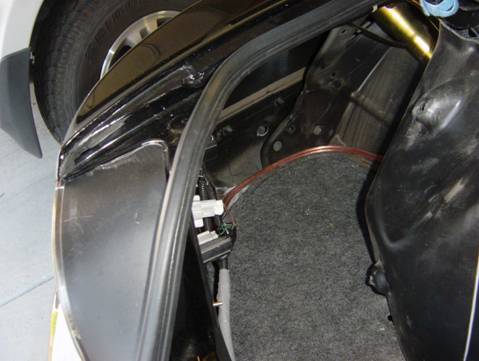
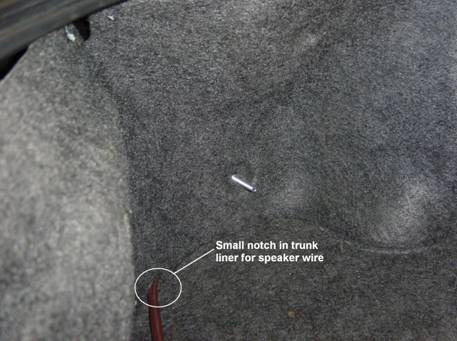
Step 4 – Run your speaker wires (see images above) and replace your panel. Re-install all mounting hardware with the exception of the lower panel rivet (this is where the bolt you installed will come through the trunk liner. You will also need to cut a small notch in the bottom of the panel in order to run your speaker wire.
Step 5 – Connect your speaker wire to the enclosure using the installed terminal posts. Be sure to respect polarity (+ and -),
Step 6 – Move your sub enclosure into place. You may need to slide the enclosure in different directions to get it to line up with the bolt installed in the previous steps.
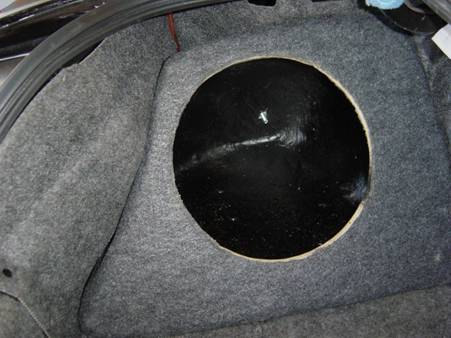
At this point you should remove your enclosure from the car so that you can test fit your sub and pre-drill the mounting screw holes. This will make the installation of the subwoofer much easier once the enclosure is mounted in the car.
Mounting your sub
in the Enclosure
For best results you should pre-drill pilot holes and use a dry-wall or fiberboard type screw to mount your subwoofer. I have included 8 such screws. Use a 1/16” or 3/64” drill bit to pre- drill your holes. I usually leave the sub in place and use it as a template for drilling the holes. Take special care not to puncture your subwoofer (I have done this before and it is both expensive and frustrating) – protect the subwoofer surround and cone material with your hand - as a bandage is less expensive than a new speaker.
If your subwoofer does not have a rubber or foam gasket to aid in sealing the sub to the enclosure you will need to acquire a suitable material to make one. Any hardware store will carry 3/8” wide 1/8” thick adhesive weather stripping (stick on one side) – this is to be applied on the back side of the subwoofer using the sticky side to fix it to the sub.
Step 7 – Reconnect the speaker wire to the speaker terminals on the enclosure, place the enclosure back into place and use the remaining hardware to secure the enclosure to the car. With the enclosure in place you first slide on the rubber washer, flat washer and then the nylon lock-nut. Tighten the lock-nut until the enclosure is held firmly in place
Slowly close the trunk lid carefully checking to make sure that the trunk lid hinge clears the enclosure.
Step 8 – With the enclosure mounted in place it is time to install the subwoofer. Connect the speaker wire inside the enclosure to the proper terminals on your subwoofer. Make sure that you are familiar with they type of sub you have (single voice coil, dual voice coil) and how it should be wired inside the enclosure.
Step 9 – Follow all instructions for properly setting up your amplifier. Typically you will set your amp (or appropriate channels if using a 4+ channel amplifier) to the Low Pass (LP) setting. A good starting point for the frequency cut-off is 120 Hz – adjustments can be made up or down until the sound is clean and undistorted – and meets your individual listening preference.
Notes:
- It has been noted that on some cars the left (driver) side enclosure may not clear the wire harness that is fastened to the left side trunk hinge. If this is the case – the simplest fix is to remove the white plastic stand-off and use a zip-tie to hold the wire harness closer to the hinge. It is also possible to run the wires on the opposite side of the hinge.